A professional installation guide for frameless glass shower doors.
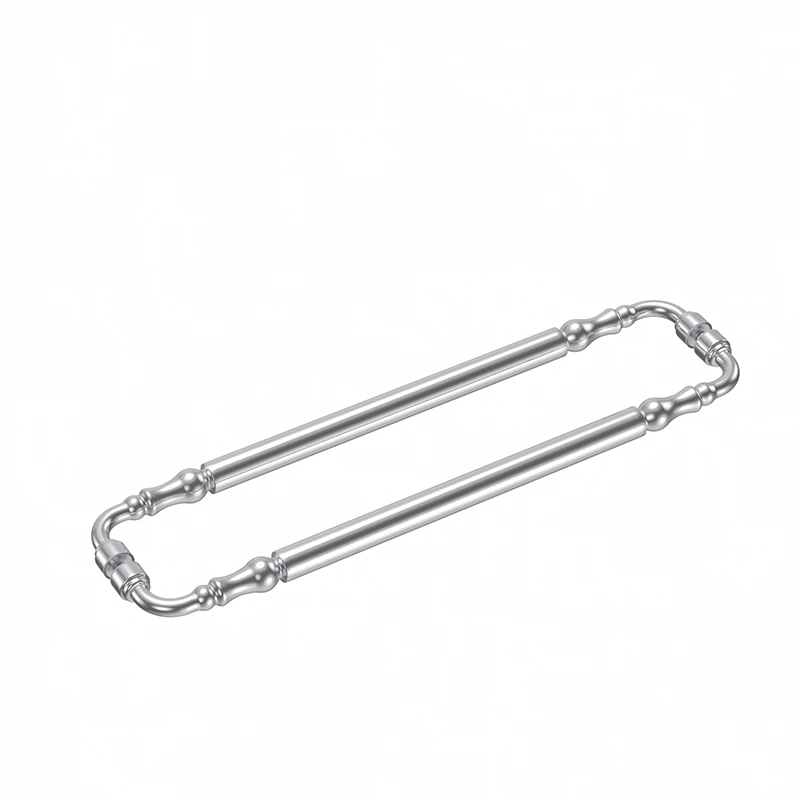
For glass fabricators, shower enclosure brands, contractors, and hotel bathroom projects, a towel bar and handle combo is a practical hardware solution for frameless glass shower doors. This dual-purpose configuration combines a sleek, space-saving interior pull grip with a heavy-duty exterior bar for hanging towels. Choosing reliable hardware, such as the Zimmor Hardware Z-5343 towel bars and handle combo, helps keep the shower door functional, stable, and visually clean.
A stable installation mainly depends on three points: correct hole spacing, proper gasket placement, and careful tightening on tempered glass.This guide provides a detailed walk-through of the installation process, focusing on technical best practices to prevent glass damage and ensure reliable, long-term performance.
Table of Contents
- 1. Structural Mechanics of Back-to-Back Hardware
- 2. Glass Preparation and Technical Specifications
- 3. Required Tools and Component Checklist
- 4. Step-by-Step Installation Process
- 5. Safe Handling and Stress Prevention for Tempered Glass
- 6. Troubleshooting and Adjusting Common Alignment Issues
- 7. Maintenance and Finish Preservation for Project Longevity
- 8. Zimmor Hardware B2B OEM & Custom Manufacturing Solutions
1. Structural Mechanics of Back-to-Back Hardware
Before beginning the assembly, it is helpful to understand the physical design of this hardware category. A back to back shower door towel bar installation relies on a unified clamping mechanism. Unlike independent towel racks, the interior pull handle and the exterior bar are anchored to the glass through shared, pre-drilled holes, locking together with a central threaded rod.
The Z-5343 towel bar handle combo uses this back-to-back design on one side, while the opposite end of the longer towel bar is secured with a single-sided through-glass mounting stud. This configuration distributes the physical pull and push force evenly across the glass face, this helps distribute the load more evenly across the glass surface..
For commercial applications and high-traffic hotel environments, choosing For commercial applications and high-traffic hotel environments, solid brass components are commonly preferred because they offer strong weight support and reliable corrosion resistance. A brass-based hardware setup offers exceptional weight support and resistance to structural fatigue, making it the preferred choice for commercial bathroom projects and renovation projects.
2. Glass Preparation and Technical Specifications
Proper glass preparation is the foundation of a stable glass shower door towel bar installation. Tempered glass should not be drilled or modified after tempering, as this may cause breakage. All holes must be pre-drilled at the factory during the fabrication phase, prior to the thermal tempering process.
When specifying hardware for a project, fabricators and contractors must ensure the pre-drilled glass holes align with the hardware’s technical tolerances. For standard installations, the following parameters are typical:
| Technical Parameter | Standard Value | Engineering Context |
|---|---|---|
| Compatible Glass Thickness | 6mm to 12mm (1/4″ to 1/2″) | Works with typical frameless residential and heavy commercial architectural glass. |
| Recommended Hole Diameter | 12mm (1/2″) | Provides sufficient clearance for plastic isolation sleeves. |
| Hole-to-Hole Distance (C-C) | 18″ (457mm) or 24″ (610mm) | Must match the exact specifications of the selected towel bar model. |
Always confirm the final hole diameter and center-to-center distance according to the product drawing or technical datasheet.
The Zimmor Z-5343 is versatile, acting as a highly adaptable hardware solution. The supplied threaded rods and gaskets accommodate varying panel dimensions, allowing for seamless integration with multiple glass profiles on the market.
3. Required Tools and Component Checklist
Having the proper tools ready prevents damage to the glass and ensures a smooth installation workflow. Before starting, gather the following items:
- Hex Key (Allen Wrench): Generally included in the hardware package to secure the locking collar set screws.
- Screwdriver: A standard manual screwdriver for tightening the main threaded assembly. Avoid power drills, as they can easily apply too much torque.
- Painter’s Tape: Helpful for securing loose washers during alignment and protecting the glass surface from tool slips.
- Spirit Level: To verify that the long towel bar is level before tightening.
- Glass Cleaner & Microfiber Cloth: To clean the surface around the pre-drilled holes.
4. Step-by-Step Installation Process
This section outlines the precise method for completing a professional the assembly.For larger architectural glass panels, having two technicians is recommended to manage the weight and prevent physical strain during assembly.
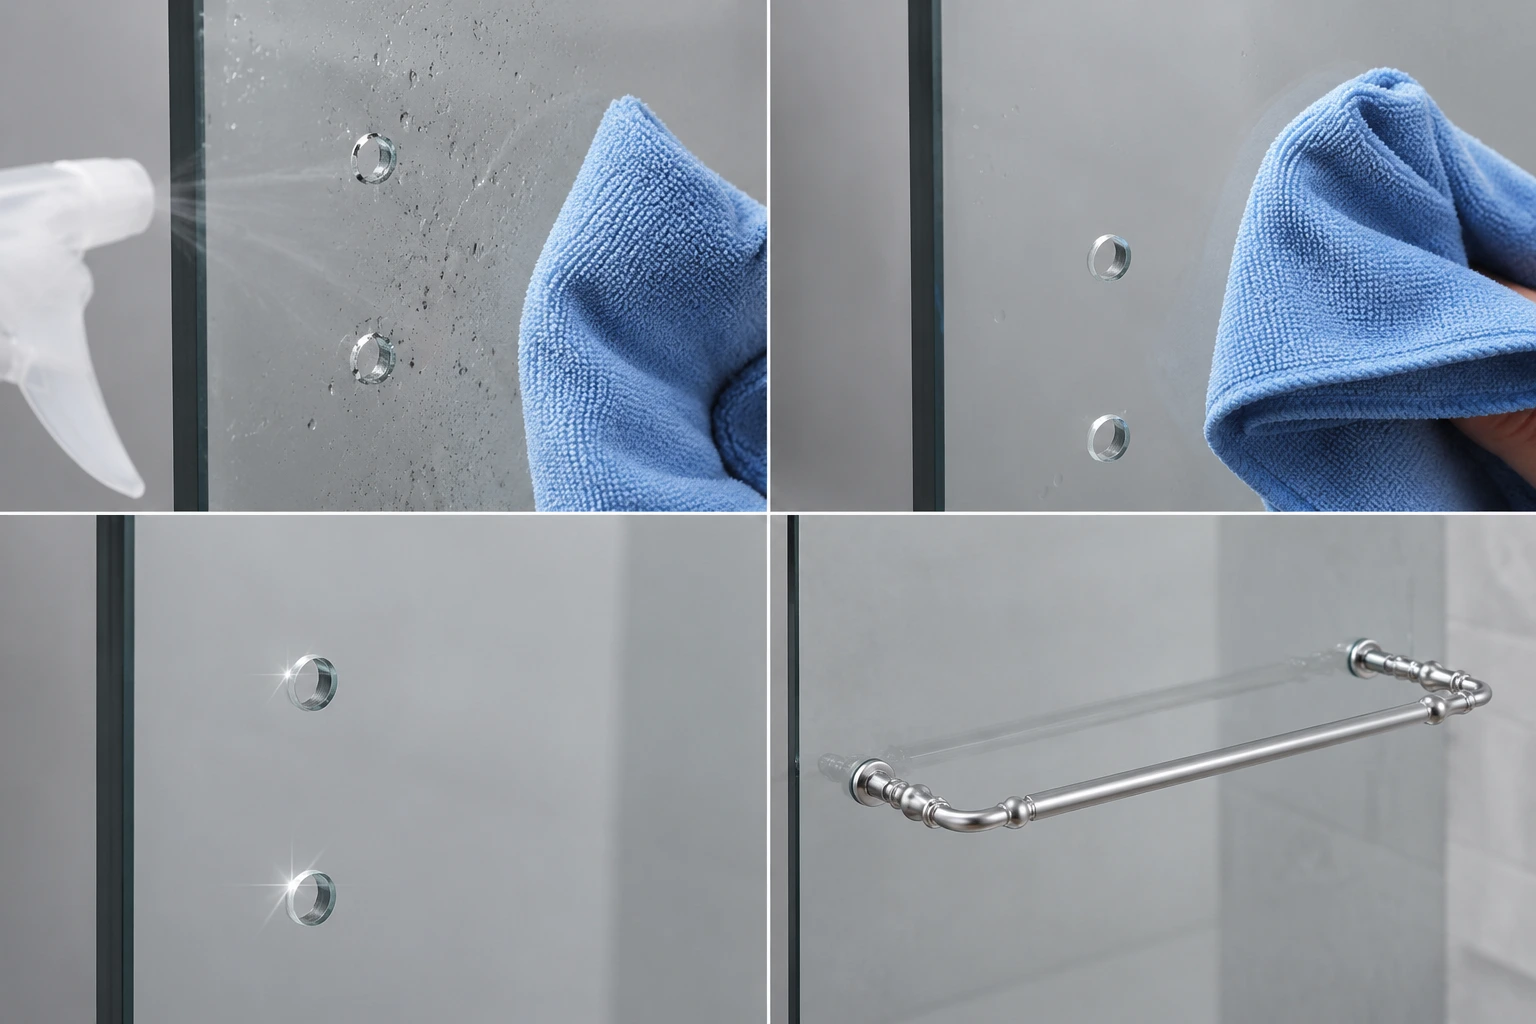
Step 1: Clean the Installation Area
Debris or oil residue around the pre-drilled glass holes can cause the hardware to slip over time. Clean both sides of the glass panel thoroughly with a glass cleaner and a microfiber cloth. Allow the surface to dry completely before placing any hardware components.
Step 2: Install the Plastic Gaskets and Sleeves
A secure installation requires paying close attention to the plastic sleeves and washers. Slide the plastic isolation sleeve into the pre-drilled glass hole. Next, place a clear plastic washer on both the interior and exterior faces of the glass hole. These non-metallic components act as critical buffers, separating the brass or stainless steel hardware from the glass.
Step 3: Mount the Interior Pull Handle
Begin with the back-to-back connection side.
- Insert the primary threaded connector bolt through the glass hole from the interior side.
- Ensure the plastic gaskets remain centered and flush against the glass on both sides.
- Thread the bolt into the receiver socket of the interior Shower Handle / Knob. Hand-tighten it to keep the component in place.
Step 4: Align the Exterior Towel Bar
Next, move to the exterior side of the shower door to align the main towel bar.
- Position one end of the exterior bar over the exposed threaded stud of the interior handle.
- Align the opposite end of the towel bar over the second pre-drilled hole, inserting the single-sided mounting screw (with its accompanying plastic gaskets) from the interior side of the glass.
- Gradually thread the screws into both ends of the towel bar by hand. Avoid cross-threading by aligning the screws perpendicular to the hardware collars.
Step 5: Level and Tighten the Hardware
Before final tightening, place a spirit level on top of the towel bar. If needed, make minor adjustments within the tolerance of the pre-drilled glass holes to ensure the bar is level.
Once leveled, tighten the main mounting bolts with a manual screwdriver. Tighten them firmly until the plastic washers compress slightly. This compression helps reduce water seepage and protects the glass surface from direct pressure.
Do not tighten one side completely before aligning the opposite side.
Step 6: Secure the Collar Set Screws
Locate the small hex grub screws (set screws) on the underside of the handle and towel bar mounting collars. Using the hex key, tighten these screws firmly. This locks the collars onto the internal mounting studs, preventing the handle from loosening or spinning during daily use.
If the bar does not sit flat against the glass, remove it and check whether the gasket or sleeve is misaligned.
5. Safe Handling and Stress Prevention for Tempered Glass
When handling frameless shower door hardware, understanding the properties of tempered glass is crucial. Tempered glass features high surface compression, making it exceptionally strong, but it remains susceptible to edge impact and point-load stress.
- Ensure proper washer alignment: Never allow metal parts of the handle or towel bar to touch the glass. Direct metal-on-glass contact under tension can lead to micro-fractures, which can result in glass breakage during temperature shifts.
- Avoid using power tools: Impact drivers or power drills do not allow for precise torque control. Over-tightening can easily fracture the glass around the mounting holes.
- Support the glass during installation: When mounting hardware on uninstalled panels, always place the glass on a soft rubber mat or thick cardboard. Avoid setting the corners of the panels directly on hard concrete or tile floors.
6. Troubleshooting and Adjusting Common Alignment Issues
During high-volume commercial installations, minor alignment issues can occur. Below are common situations and their technical solutions:
Issue A: The Towel Bar is Out of Level
Solution: Loosen the mounting bolts on both sides slightly, allowing the hardware to move within the pre-drilled holes. Place a level on top of the bar, adjust it to the correct horizontal position, and re-tighten the screws while holding the bar in place.
Issue B: The Pull Handle is Loose or Wobbles
Solution: A loose handle is typically caused by loose set screws on the mounting collar. Back out the hex grub screws slightly, verify that the main mounting bolts are fully tightened, and then re-tighten the grub screws securely.
Issue C: Missing Gaskets or Sleeves
Solution: Do not substitute metal washers for plastic gaskets. If a gasket is missing, pause the installation and source a compatible plastic or silicone replacement to protect the glass from metal contact.
7. Maintenance and Finish Preservation for Project Longevity
Maintaining the finish of premium bathroom hardware is essential for long-term project quality. Proper cleaning prevents mineral buildup and oxidation, especially in commercial spaces with high-mineral water.
- Daily Care: Wipe the towel bar and handle with a soft, dry cloth after use to prevent water spots and soap residue from etching the metal surface.
- Weekly Cleaning: Clean the hardware with warm water and a mild liquid dish soap. Avoid using abrasive scrubbing pads, which can scratch electroplated or powder-coated surfaces.
- Avoid Harsh Chemicals: Do not use industrial acid-based descalers, bleach, or ammonia. These harsh chemicals can strip away protective coatings, leading to tarnishing or pitting on matte black, chrome, and brass finishes.
8. Zimmor Hardware B2B OEM & Custom Manufacturing Solutions
For global shower enclosure manufacturers, distributors, and contract builders, partnering with a reliable manufacturer is key to ensuring consistent product quality and timely delivery. Zimmor Hardware is a professional, B2B-focused manufacturer specializing in frameless shower door hardware.
We offer comprehensive OEM/ODM services, allowing clients to customize specifications, dimensions, and materials to match specific architectural projects. Through our advanced production facilities, we provide a wide range of reliable custom shower hardware finishes, including Matte Black, Brushed Gold, Satin Brass, Polished Chrome, and Brushed Nickel.
Every Zimmor product, including our specialized towel bar handle combos, undergoes thorough quality checks to ensure long-term performance and stable quality in demanding environments. Contact Zimmor Hardware to request a quote, technical drawing, sample, or custom finish support for your shower door towel bar and handle combo project.