

A frameless shower door installation begins with approved glass and hardware drawings, verified site conditions and a qualified glazing installer. Use the exact product instructions and project documents for drilling, fixings, adjustment and sealing; generic measurements or torque values cannot define every enclosure.
Key Takeaways
- Confirm the opening, wall and floor conditions before glass is ordered.
- Match the glass schedule and cut-outs to every hinge, clamp, channel and seal model.
- Verify wall substrate, backing and approved fixings against the installation documents.
- Do not cut, drill or edge fully tempered glass after heat treatment.
- Inspect operation and complete handover using the project and manufacturer checklists.
Who should use this installation checklist?
This guide is for enclosure buyers, fabricators and installers coordinating a frameless glass shower project. It helps organize the checks that should be complete before site installation; it is not a universal drilling or fastening recipe. The National Glass Association’s Frameless Shower Enclosure Design and Installation Manual is written to assist glass professionals and directs users to manufacturers and material suppliers for system-specific details. Follow the approved drawings, local requirements and the current manual for the exact hardware.
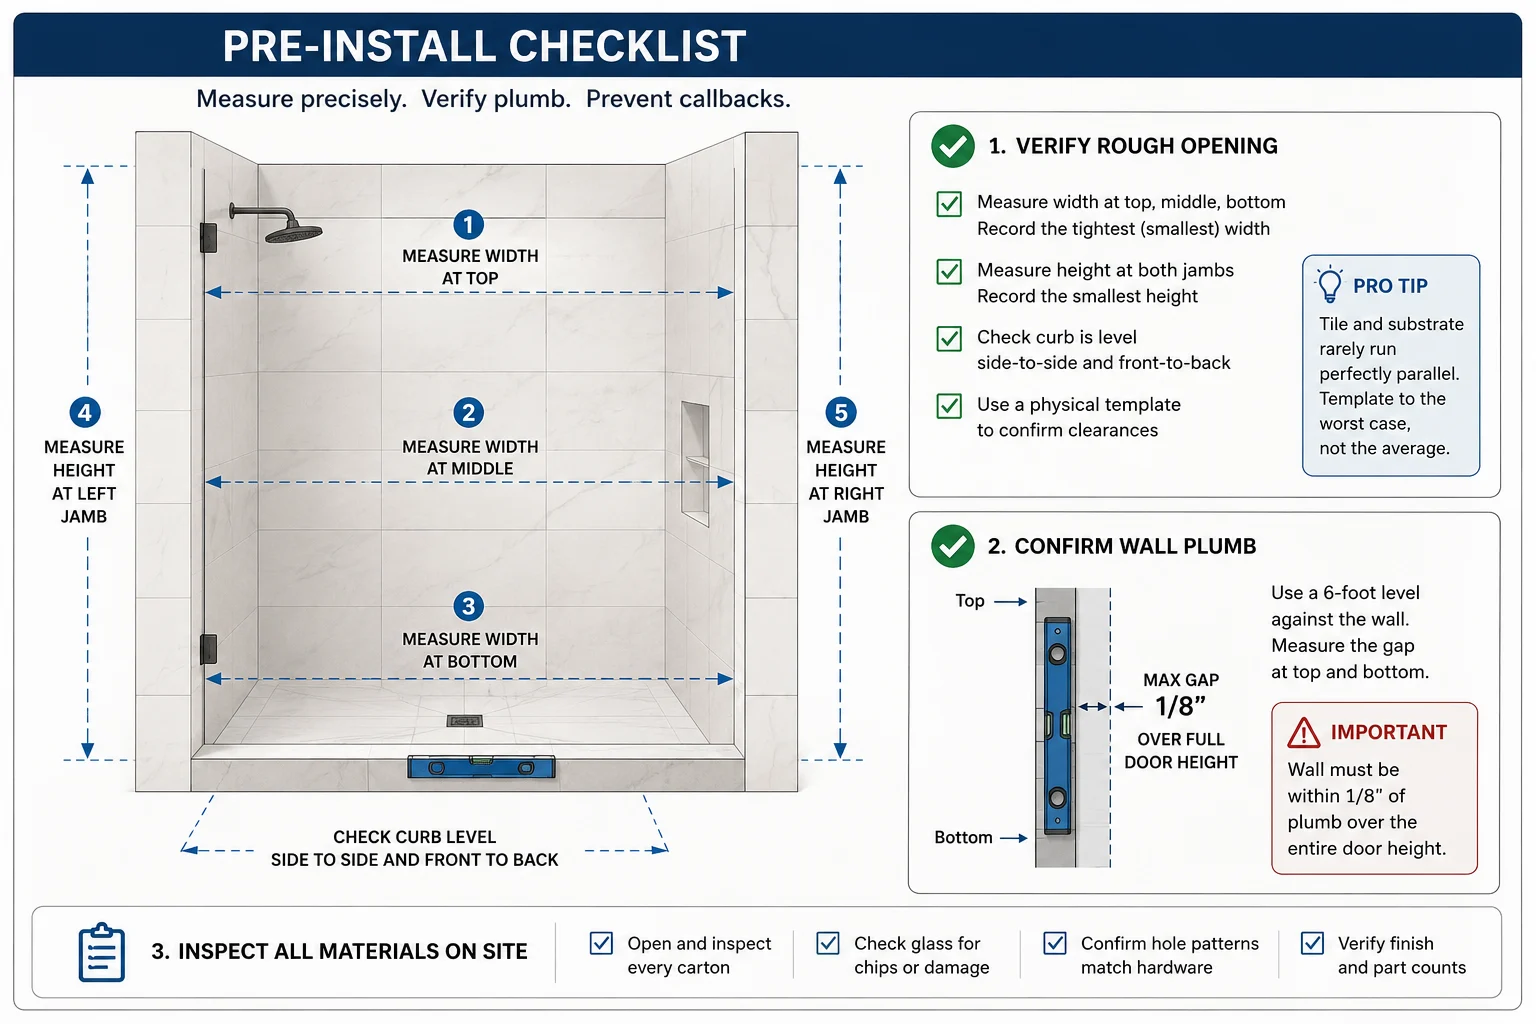
1. Confirm site conditions and the approved layout
Review the opening, adjacent walls, curb or floor, ceiling, plumbing, door swing and access to the work area. Record actual measurements and surface conditions on the project drawing. The responsible designer or fabricator should resolve out-of-plumb, out-of-level, uneven or out-of-square conditions using the selected system’s design limits. Do not copy a tolerance from a different enclosure or use a hinge adjustment to conceal a site discrepancy.
Confirm the glass-panel arrangement, door opening direction, support locations and required clearances. If the actual opening differs from the approved drawing, stop and obtain written direction before ordering or altering any component.
2. Check the glass schedule and hardware as one set
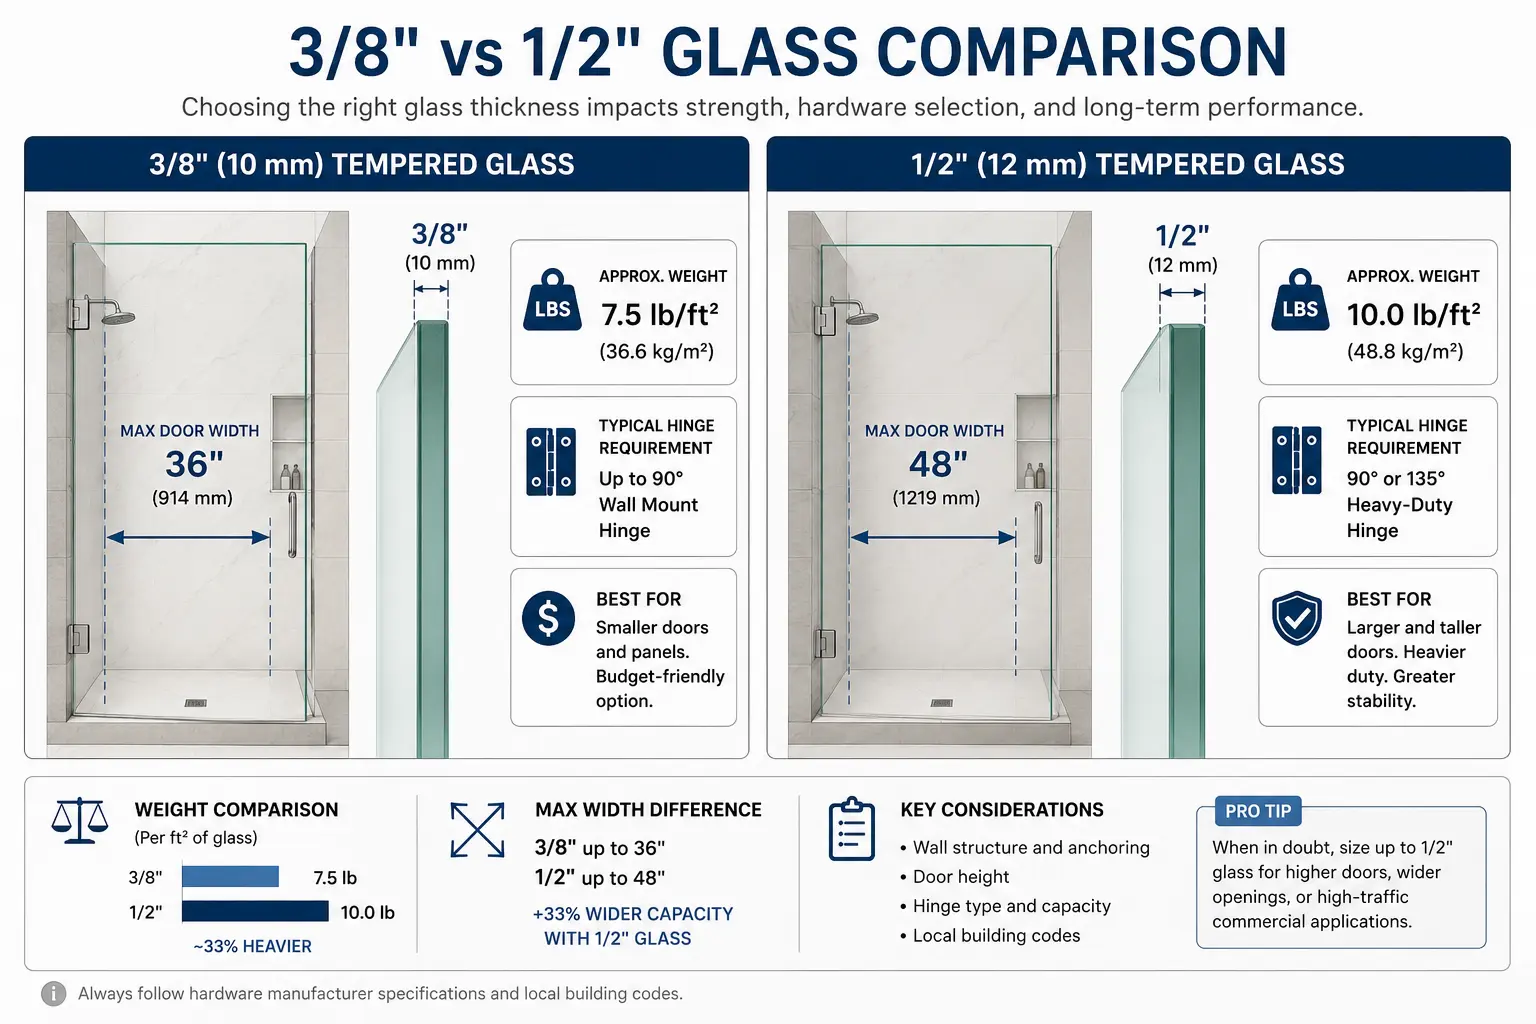
Before fabrication, compare the glass schedule with each hinge, clamp, pivot, channel, handle and seal drawing. Verify the specified glass type and nominal thickness, panel dimensions, edge details, holes, notches, fitting count, hardware position, gaskets and door swing. Ask the glass fabricator and hardware supplier to confirm the exact model and configuration if any detail is missing or inconsistent.
Approve all dimensional fabrication before heat treatment. The NGA manual and ASTM C1048-25 state that heat-strengthened and fully tempered glass must be fabricated before strengthening or tempering; do not attempt to drill, cut or grind finished tempered glass on site. For a U.S. project, also confirm the applicable safety-glazing rules; other project locations may have different requirements.
See the glass specification guide and hinge and glass compatibility checklist.
3. Verify substrate, support and fixings
Identify the wall or floor assembly behind the finished surface at each fixing point. Confirm required backing, substrate, anchor, fastener, drilling method and embedment from the approved system documents. Tile and grout appearance alone do not identify the structural support behind them. If the substrate or fixing differs from the approved plan, get a design or supplier resolution before drilling.
Check that the selected support arrangement is shown on the enclosure drawing. A stabilizer bar, clamp, channel or hinge should not be added as a substitute for missing support or an incompatible component.
4. Plan safe handling and component installation
Before moving glass, the installation lead should set a handling plan for the panel size, access route, site protection and appropriate glass-handling equipment. Keep the panel protected and supported as specified by the glass and hardware documents. Confirm every component and fixing against the schedule before it is placed.
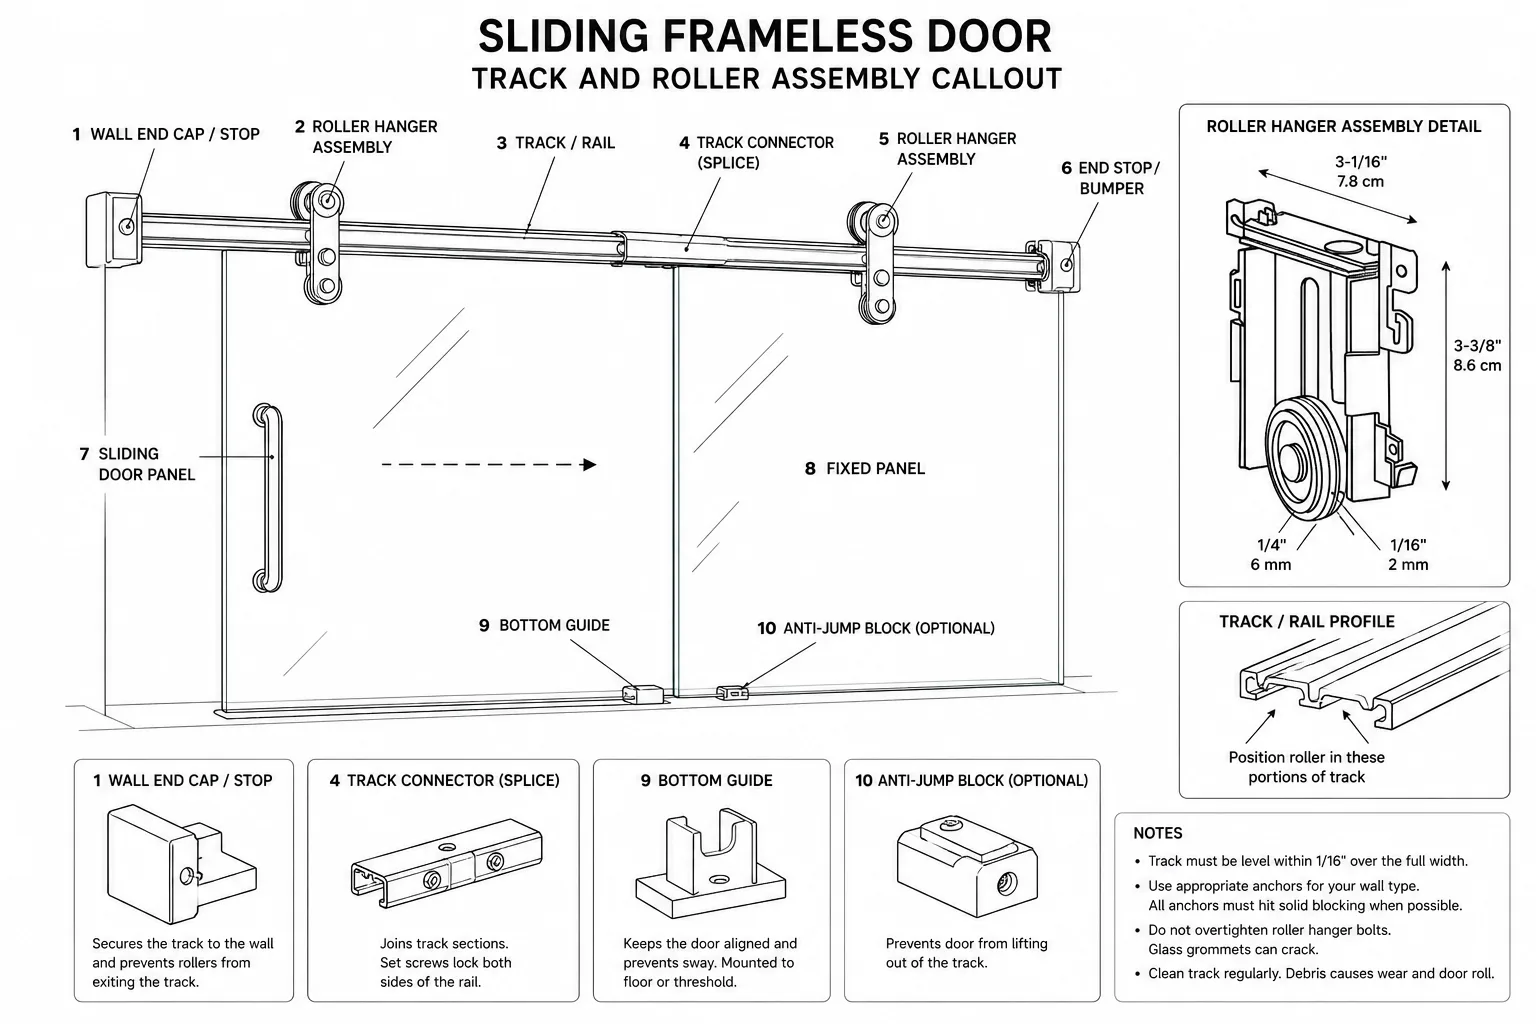
Install the hardware in the sequence and orientation shown in the model instructions. Use only the supplied or approved gaskets, sleeves and fasteners. Follow the specified drilling procedure for the actual substrate and the stated tightening or adjustment instructions for that exact model. Do not use a generic torque, anchor or hinge-adjustment value.
5. Complete adjustment, sealing and handover
After the glass is supported and the hardware is installed, check door clearance, movement, alignment, contact points, fittings and fasteners against the approved documents. Do not force the door into alignment or allow glass to contact hard surfaces. Resolve any movement, looseness, visible damage or drawing mismatch before handover.
Apply seals and sealant at the locations and in the sequence approved for the enclosure system. Use the specified material and follow its preparation and cure instructions. A frameless enclosure is not guaranteed watertight by hardware alone; expectations depend on the overall design, opening, surface conditions and installation.
Record final checks, approved substitutions, care instructions and any maintenance schedule required by the manufacturer. The hinge replacement checklist explains how to resolve a model mismatch before reassembly.
Frequently Asked Questions
Can a homeowner use a generic guide to install any frameless shower door?
No. Frameless glass and hardware systems have model-specific drawings, installation instructions and local requirements. Have the project reviewed and installed by a qualified glazing professional.
Can tempered glass be drilled after it is delivered?
No. Fully tempered glass should not be cut or drilled after heat treatment. The fabricator must prepare approved holes and cut-outs before tempering.
Which anchors should be used for a wall-mounted shower hinge?
Use the fixing specified for the exact hinge and verified wall substrate. If the substrate or backing differs from the approved drawing, ask the project designer or supplier before drilling.
Can I use one torque value for every shower hinge?
No. Follow the current installation instructions for the exact model and fixing system. Do not substitute a generic tightening value.