

A shower hardware specification should describe one complete, approved assembly for a defined project. Record the glass, exact hardware models, mounting conditions, finish, required documents and acceptance owner together; no generic thickness or load table can replace the product drawings and project review.
Key Takeaways
- Define the project location, application, responsible designer and applicable requirements first.
- Match glass fabrication drawings with each hinge, clamp, fitting, support and seal model.
- Request model-specific limits and test documents with the configuration and criteria identified.
- Specify substrate, finish code, sample approval and care instructions for every visible component.
- Use a release checklist so substitutions and drawing revisions are reviewed before production.
1. Define project scope and applicable requirements
Identify the building type, room or enclosure, project location, user requirements and installation conditions. Ask the project designer or authority having jurisdiction to identify the safety, building, accessibility and testing requirements that apply. Requirements vary by market and application; do not copy a code reference or certification list from another project.
For U.S. projects, shower doors and enclosures are included within the CPSC architectural-glazing safety standard. Other locations may use different regulations and referenced standards. Record the applicable document, edition, evidence needed and person responsible for acceptance. The CPSC summary identifies the U.S. product scope.
2. Coordinate glass, hinges and fittings
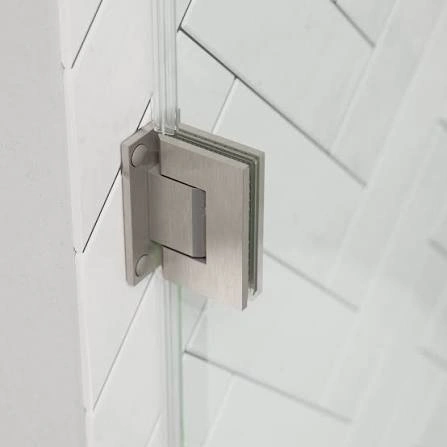
Use the approved glass schedule and shop drawing to identify glass type, nominal thickness, panel dimensions, edge treatment, holes and cut-outs. Match each detail to the current drawing for the exact hinge, clamp, bracket, handle or pivot model. Also record the door swing, panel relationship, gaskets, fixing locations, mounting substrate and adjustment limits.
Ask the hardware supplier to confirm in writing that its published limits apply to the specified panel dimensions, model, fitting count and mounting arrangement. Do not copy a load figure, door width, glass range or hinge count from a different model. The glass and hinge compatibility guide shows which drawing details to compare.
Complete all holes, cut-outs and edge fabrication before heat treatment. The National Glass Association states that heat-strengthened and fully tempered glass cannot be cut, drilled or edged after heat treatment. See the NGA glazing manual and have the glass fabricator resolve any drawing conflict before production.
3. Specify mounting and support conditions
For each wall fixing, identify the supporting substrate, backing, approved fastener or anchor, installation sequence and inspection record required by the project documents. For glass-to-glass fittings, coordinate both panel preparations and the specified relationship between the panels. For a stabilizer bar or support system, show the approved endpoints and model on the enclosure drawing.
Do not use an accessory to compensate for a mismatched hinge, incomplete support or unapproved wall fixing. The installer should stop and request a written design or supplier resolution when the actual site condition differs from the approved drawings.
4. Define material, finish and testing evidence
List the base material, finish code, color, surface appearance and care instructions for every visible part. Request the material and finish documents for the exact model rather than accepting generic terms such as stainless, marine grade or premium. Approve a production-representative sample and define how substitutions will be handled.
If a corrosion test is part of the purchase requirement, cite the test method and revision, specimen configuration, exposure, acceptance criteria and report issuer. ASTM B117 describes the apparatus and salt-fog test conditions but does not set a product-specific exposure time or result interpretation. ASTM notes that stand-alone salt-spray results seldom predict natural-environment performance. See the ASTM B117-26 scope and our salt-spray report guide.
5. Specify seals, accessories and interfaces
List each seal, sweep, gasket, handle, towel bar and support by model or drawing. Confirm the interface dimensions and materials against the selected glass and hardware, then state color, quantity and location. Water-management performance depends on the complete enclosure design and installation; do not describe an individual fitting as a universal waterproofing solution.
6. Keep a controlled procurement file
- Project location, applicable requirements and acceptance owner.
- Approved glass schedule and revision-controlled shop drawing.
- Hardware schedule with exact model numbers and linked product drawings.
- Written confirmation of the configuration limits and mounting details.
- Material, finish, sample, test and maintenance documents required for acceptance.
- Substitution, inspection and non-conformance approval process.
Keep the approved file with the purchase order. If the glass, model, mounting condition or finish changes, review the affected documents again before release. Related guidance: glass thickness specification, finish selection and installation planning.
Frequently Asked Questions
What belongs in a shower hardware specification?
Include the project location and requirements, approved glass schedule, exact hardware models, mounting details, finishes, required test or compliance records and the acceptance owner.
Can I use a generic hinge load table for a project?
No. Use documentation for the exact model, glass dimensions, fitting count and mounting arrangement, then have the responsible project professional confirm the complete assembly.
Does a salt-spray report prove real-world service life?
No. Review the method, specimen, acceptance criteria and corroborating evidence. ASTM B117 says stand-alone salt-spray results seldom predict performance in natural environments.
When should the glass holes and cut-outs be approved?
Approve them with the glass fabricator and hardware supplier before heat treatment. Do not cut or drill fully tempered glass after heat treatment.